Five Car Maintenance Tasks You Can Do at Home
Looking for ways to keep your car in good condition? Good news! There are so many maintenance tasks that you can do yourself, at home. Go ahead and give these 5 easy jobs a go. You’ll soon be a maintenance pro!
Car maintenance matters
Looking after your car will save you money, time, and hassle over the course of your lease. That’s more money and time for the exciting things in life, rather than an expensive repair at the local garage. It’s a no brainer, right?
Why you should get stuck into car maintenance:
- Your car will run more safely
- You’ll feel like a DIY legend
- Your car should be more reliable
- You could save money on car repair costs
Skipping routine car maintenance can leave your car feeling very sorry for itself! A badly maintained car could result in a breakdown or a nasty surprise repair bill. Not fun.
5 Tips to Keep Your Car Good as New
Check your engine oil

Did you know that checking your fluid levels is one of the simplest car maintenance tasks? Running out of oil is an easy mistake to make but it’s a mistake that could cause serious engine damage.
The hardest part about engine oil upkeep is actually remembering to check it. Your car’s user manual will tell you how often you should be changing your oil. Once you’ve found out, set a calendar alert in your phone and you’ll never forget again!
So, how do you check it? Some modern cars are fitted with electronic oil monitors so you can read your oil level from your dashboard. For the majority of cars though, drivers will have to check the oil levels themselves. It’s a hard life.
Five easy steps to check your engine oil:
- Make sure you’re parked on level ground and your engine is cold.
- Open your bonnet and find your dipstick. Unsure where this is? Just check your user manual!
- Pull the dipstick out and wipe the oil off with an old cloth. Note the two marks on the dipstick, for the minimum and maximum oil level.
- Pop the dipstick back into the tub and make sure to push it all the way in. Let it sit for a minute and then remove it.
- If the level is halfway between minimum and maximum, then you don’t need to top your oil up. But if it’s below the hallway mark it’d be a good idea to add a bit of oil. And if it’s below the minimum mark, you definitely need to add oil.
Need to top up? Here’s how:
- Start by getting the right oil for your car, you’ll find this info in your car’s user manual.
- Pop your bonnet and find the oil cap. It’s the one with the picture of an oil can.
- Take the cap off and add the oil in a little bit at a time. It’s really important not to go crazy with the oil, as too much could cause damage. You can check the level on the dipstick to make sure you’re not going overboard.
- Once your oil is topped up, put the cap back on the oil and the dipstick back into its tube. And you’re done!
Replace your air filters

We all need to breathe clean air to stay fit and healthy. And it’s the same for cars. Your engine breathes through an air filter. It’s the filters job to stop dirt – like dust and debris – from getting into the incoming air.
A dirty air filter could:
Hinder your car’s performance
Clean air is essential to your car’s performance. A dirty air filter limits the amount of air flowing into your car’s engine, making the engine work harder. This can reduce the power of your car.
Guzzle your fuel
Since your car is having to work harder with a clogged air filter, it’s also using more fuel and lowering your fuel efficiency. A clogged filter could see you spending even more time at your local petrol station. Yikes.
Cause expensive damage
Engines are very sensitive. If a bit of dirt (as small as a grain of salt) got through a damaged air filter, it could do a LOT of damage. So, you could either look forward to an expensive bill from your local garage. Or you could maintain your air filter and save yourself some money…
How to check and change your air filter
You’ll need to check your car’s user manual for guidance on which filter to use, where it’s located and how often you should change it. Most filters are under the bonnet, but some live behind the glovebox.
- Open the air filter box. You’ll need to remove the fasteners to do this e.g., screws and clips. You can then take the top of the air filter box off and take the air filter out.
- Grab a cloth and remove any dirt in the box.
- Inspect the air filter to see how dirty it is. If you see a lot of dirt inside the pleats, then it’s time to replace. You can also test how clogged your filter is by tapping it, if dirt falls out then you really need to replace it.
- Need a new one? Pop your new air filter into the box. Be sure to check any markings on the air filter, so you know which way up to insert it.
- Place the top back on the box and attach all of the fasteners you took off at the beginning.
- Feel totally smug that you just saved yourself a trip to the garage for a filter change – nice!
Do exterior light checks

From headlights to brake lights and reg plate lights, there are lots of exterior lights to check from time to time. Whilst parked up, have someone walk around your car as you test each of the lights. They should check all your lights are working well and are clearly visible. Light checks are especially important in the winter, the bad weather can play havoc with a car’s electrics, and we have fewer light hours.
Regular light checks will help to keep yourself and other road users safe. Plus, you may get stopped by the police if you’re driving round with broken lights at night. The penalty will vary depending on the situation but could include fines and licence points.
Be sure to regularly check your trye tread

Listen up, checking your tyre tread depth is one of the most important checks that you can do! If your tyres are below the legal minimum tread depth you could be paying a hefty fine of up to £2,500 per tyre. You’ll also get three points on your licence, per tyre.
If that isn’t a big enough reason to check your tyres today, it’s also extremely dangerous for both you and other road users. In wet conditions worn tyres will have less grip. Less trye grip means you car will have less traction, braking and handling. In other words, worn tyres are an accident waiting to happen.
It’s time to check your tread
Tyre tread is the grooved rubber that runs the whole way round the tyre – the part that comes into direct contact with the road.
The legal tyre tread depth for cars in both the UK and Europe is 1.6mm across the central three quarters of the tyre. It’s best to never let your tyres get this low though. The deeper the tyre tread is, then the better they’ll grip to the road. The more grip your tyres have, the better. Typically, 5mm or greater is a good depth.
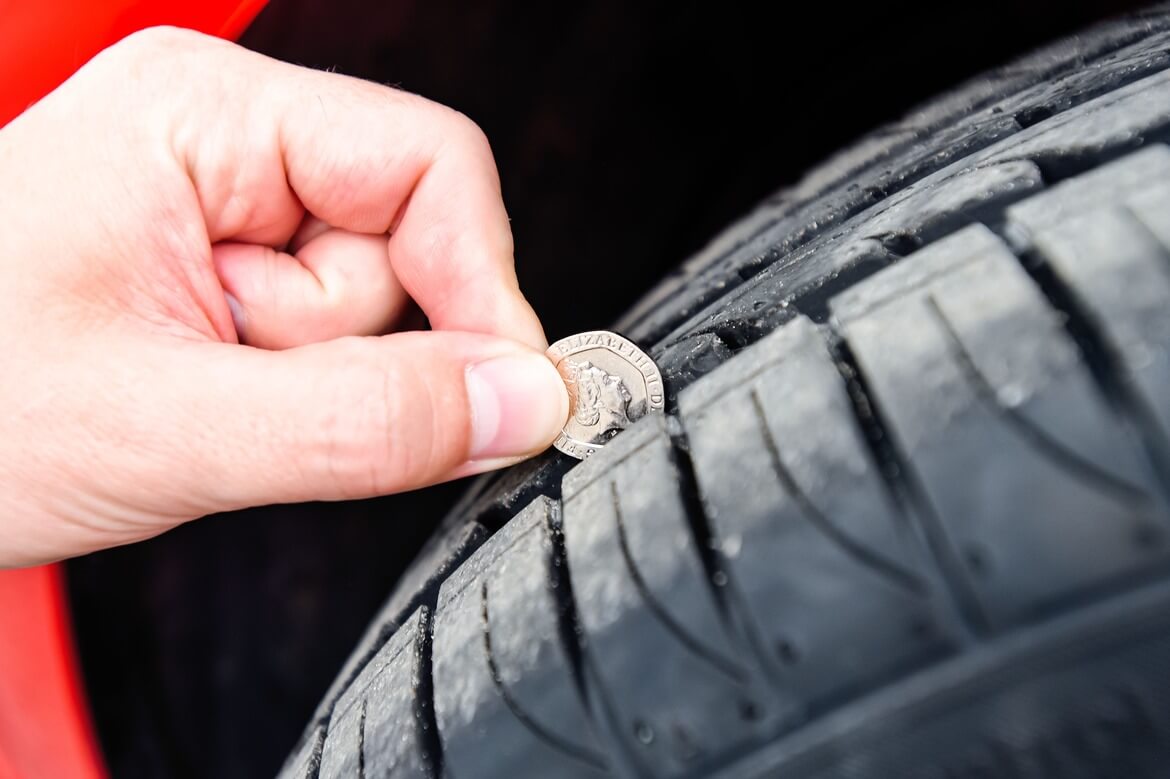
Here are 3 easy ways to check your tread:
With a 20p
Just take a 20p coin and insert it into the tread grooves. If you can’t see the outer band of the coin, your tyres are above the legal limit. If you can see the outer band and the whole coin is visible, your tyres are most likely unsafe and need replacing.
With tyre tread wear indicators
If you thought using a 20p was easy, you’ll love this. Did you know that a lot of tyres come with tread indicators embossed on them? It’ll usually have a line or an arrow below the outer tread. If the tyre is flush with the indicators, then your tyre is below the legal limit. You’ll need to get your tyres replaced before you continue using your car.
With a tyre tread depth gauge
You can use a tyre tread depth gauge to do precise, regular checks. The gauge measures the depth of an individual tyre groove. All you need to do is place it on the surface of the tyre and push the measuring pin end down. Make sure the pin is in the centre of the groove. From there you’ll be able to get the depth reading.
Act when a warning light appears

I’m sure we’re all guilty of turning a blind eye when a warning light appears on our dashboard. Or, we say we’ll look up what it means or take it to the garage and then life gets in the way.
Whatever the excuse, warning lights can be serious and need to be dealt with asap. If you leave the problem unchecked, it could become an even bigger issue that ends up costing you even more to fix. It can also be unsafe to drive around with certain warning lights like engine, breaking or power steering lights.
Ready to do some learning? The RAC have put together a useful warning lights guide so you can learn what’s what.
When it comes to the big maintenance jobs like MOTs, servicing, and tyre TLC, we’ve got you. Just add our maintenance package when you build your lease. You’ll enjoy easy online booking, manageable monthly payments, and peace of mind that you’re covered for those big car bills.


Posted on: 17th May 2023